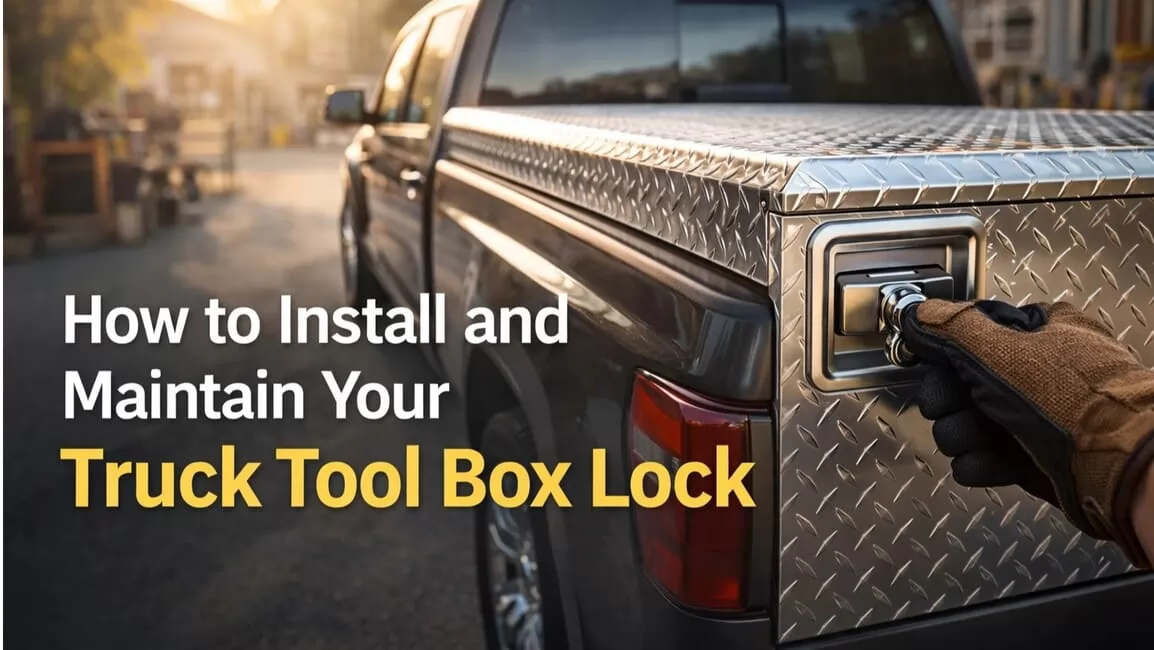
How to Install and Maintain Your Truck Tool Box Lock: A Step-by-Step Tutorial
Introduction
A truck tool box is an indispensable asset for professionals and DIY enthusiasts, offering secure storage for valuable tools and equipment. However, the security of your tool box is only as strong as its lock. A compromised or poorly installed lock can expose your assets to theft and the elements. This comprehensive guide will walk you through the detailed process of installing and maintaining your truck tool box lock, ensuring maximum security and longevity. With years of experience in providing top-tier hardware solutions, our team has a deep understanding of what makes a product reliable, a commitment you can learn more about by reading about us.
Choosing the Right Truck Tool Box Lock
Understanding the various types of locks is crucial for selecting the best option for your needs. Each type offers a different balance of security, convenience, and ease of installation. You can see examples of these mechanisms in our range of truck tool box locks.
- Paddle Handle Latches: Favored for their enhanced security and ergonomic design, these latches provide a durable and smooth operation. Their robust construction makes them a prime choice for protecting high-value contents.
- T-Handle Locks: Known for their straightforward design, T-handle locks are typically easier to install. They offer reliable security for a wide range of applications.
- Cylinder Locks: Many tool boxes feature replaceable cylinder locks. This modular design is cost-effective, as you can often replace just the cylinder if keys are lost or the mechanism is damaged.
- Automatic Locks: For ultimate convenience, 12-volt electric locks can be integrated with your vehicle’s central locking system, allowing for synchronized locking and unlocking.
Essential Tools and Materials
Before you begin, gather the following tools and materials to ensure a smooth installation process:
- Power Drill & Drill Bits: A set of high-speed steel (HSS) drill bits is recommended for drilling into metal.
- Tape Measure & Marker Pen: For precise measurements and marking.
- Center Punch: To create an indentation for the drill bit, preventing it from slipping on the metal surface.
- Fasteners (Bolts, Nuts, Washers): Use stainless steel or zinc-plated fasteners for corrosion resistance. Sealing washers can provide extra waterproofing.
- Your New Lock Mechanism: Ensure you have a quality lock, whether it's a paddle latch or a T-handle, as the material and build quality are critical for security.
- Dremel Tool (Optional): For making fine adjustments to openings.
- Safety Gear: Always wear protective gloves and safety glasses.
Step-by-Step Installation Guide
This enhanced guide provides detailed instructions for a professional-quality installation. While steps are generally applicable, always refer to the manufacturer's instructions included with your specific lock.
1. Preparation and Placement
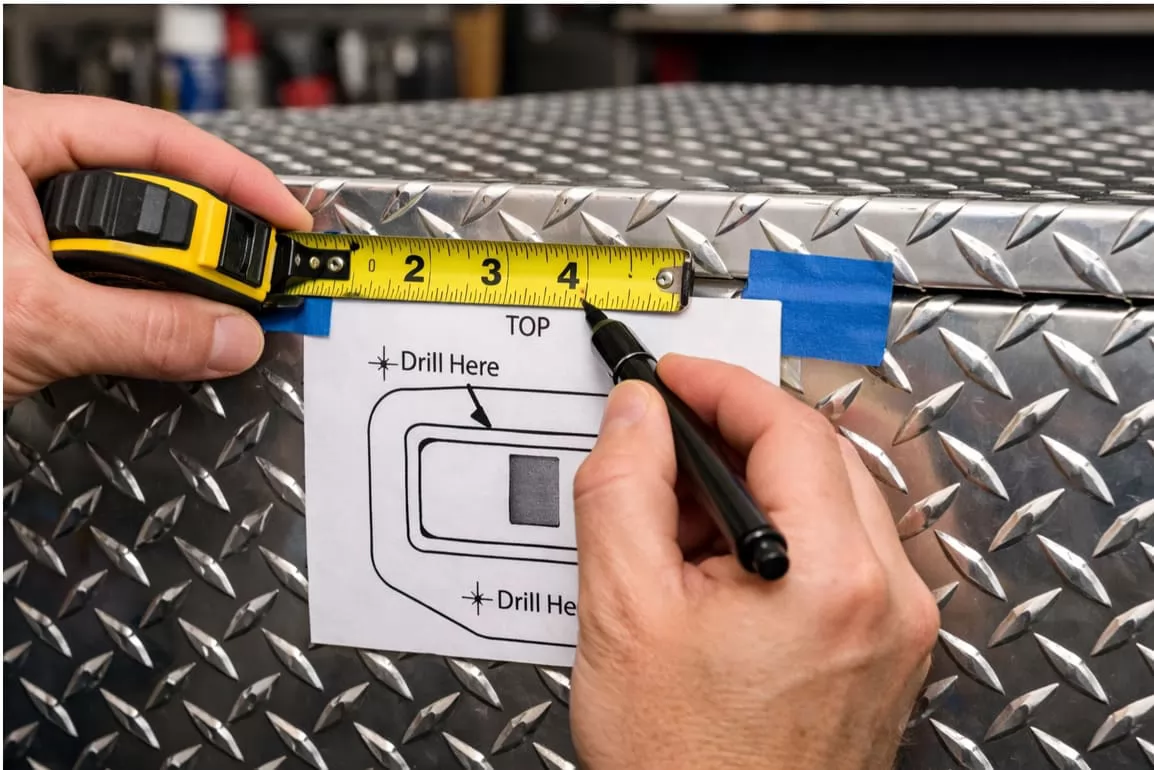
- Assess and Measure: Carefully determine the optimal position for your new lock. It should be placed for both ergonomic access and to ensure even pressure on the lid seal when closed. Measure multiple times before marking.
- Create a Template: For complex locks like paddle handles, create a paper template of the cutout and mounting holes. Tape it to the tool box to visualize the final placement and ensure it doesn't interfere with internal components.
- Mark Precisely: Use a fine-tipped marker to transfer the hole locations from your template (or the lock itself) to the tool box surface. Use a center punch to make a small indent at the center of each marked hole. This critical step prevents the drill bit from “walking” and ensures accuracy.
2. Drilling and Cutting
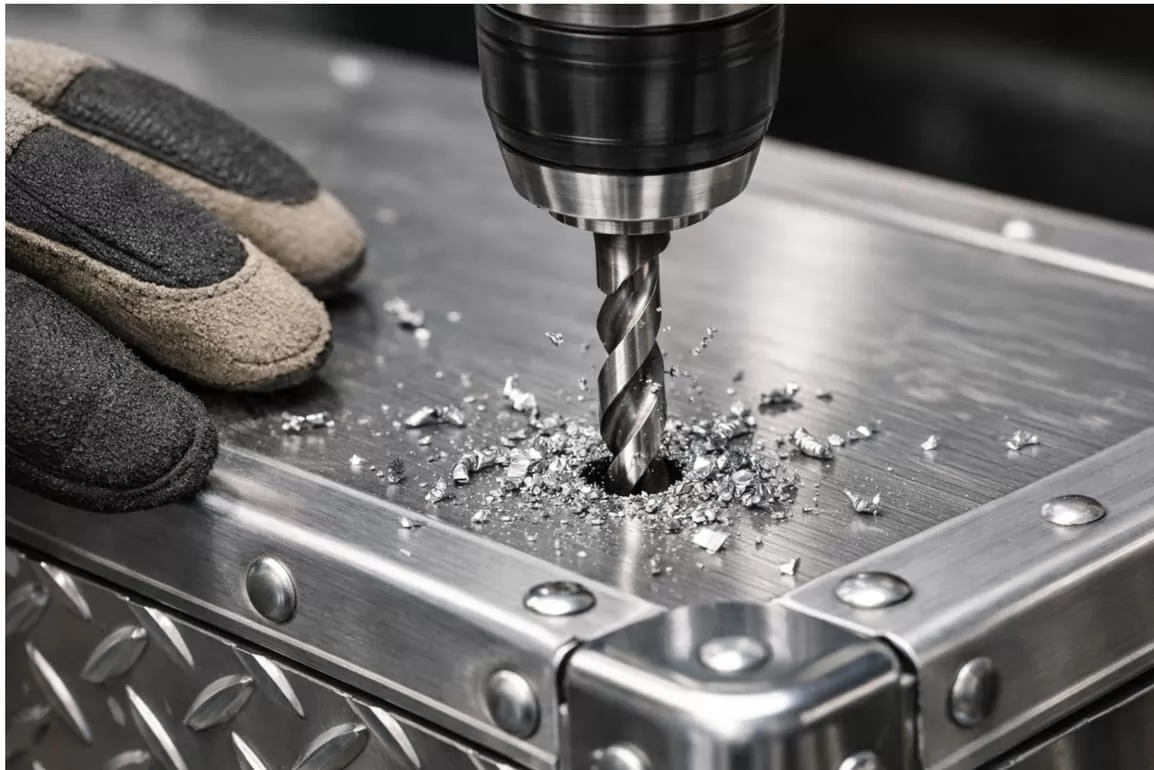
- Drill Pilot Holes: Start by drilling small pilot holes at each marked location. This makes it easier and safer to drill the final, larger holes.
- Drill Final Holes: Switch to the correct size drill bit for your mounting bolts and enlarge the pilot holes. Apply steady pressure and, if possible, use a drop of cutting fluid to reduce heat and wear on the bit.
- Cut the Main Opening (if required): For paddle latches, you may need to cut a larger rectangular opening. Use a Dremel with a cutting wheel or a jigsaw with a metal-cutting blade. Work slowly and carefully, staying inside your marked lines. Smooth any sharp edges with a file or the Dremel’s grinding stone.
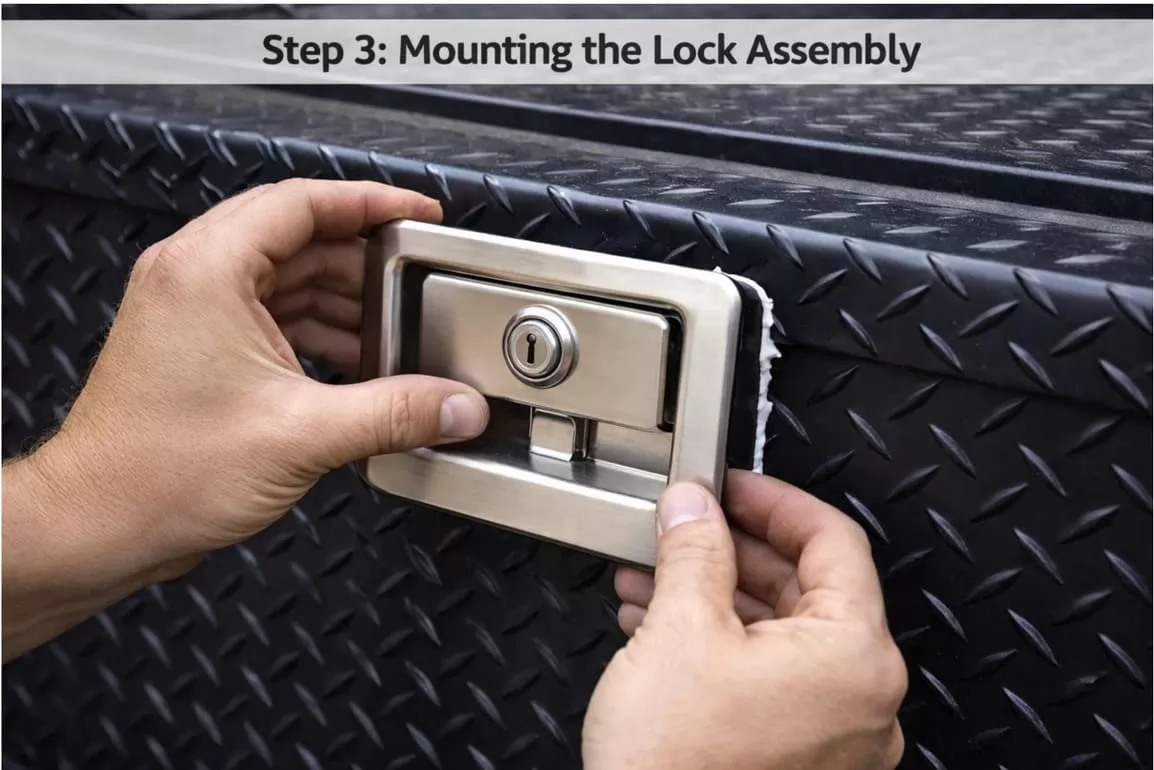
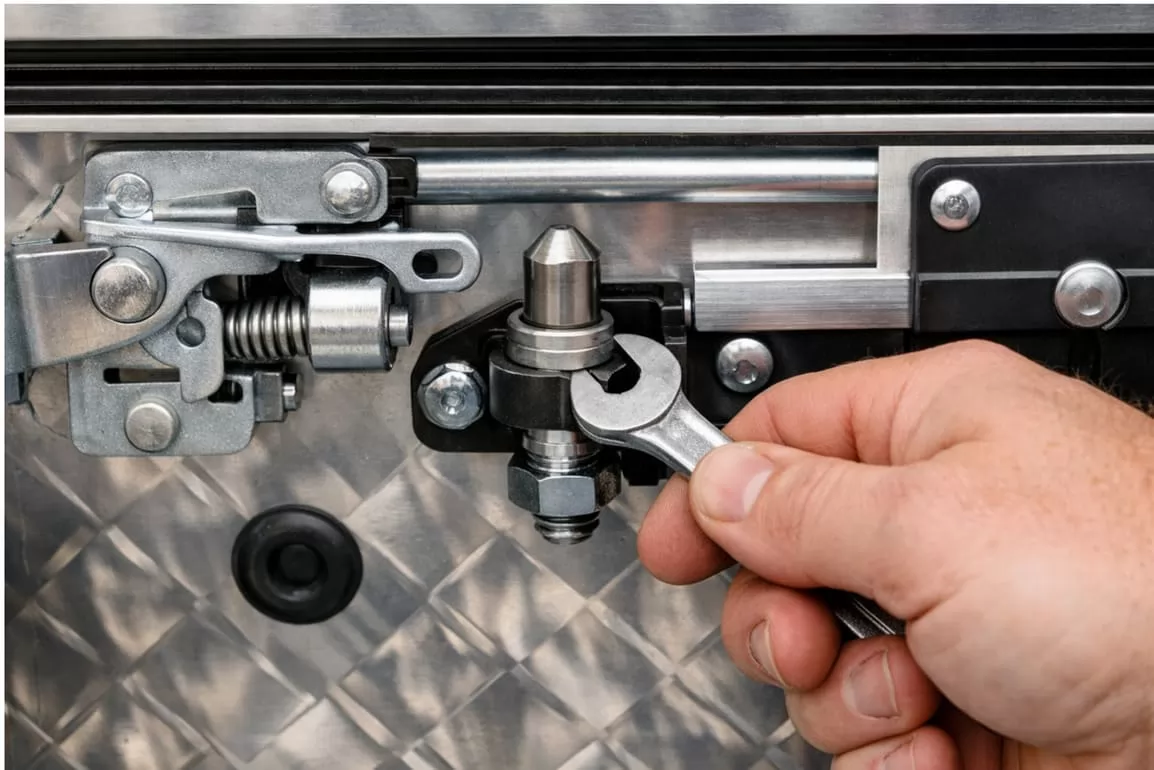
3. Mounting the Lock Assembly
- Test Fit: Before final mounting, place the lock assembly in the opening to ensure a snug fit. Make any necessary minor adjustments now.
- Apply Sealant: For superior weather resistance, apply a thin bead of silicone sealant around the edge of the cutout before inserting the lock. This creates a waterproof barrier.
- Secure the Lock: Insert the lock and fasten it from the inside using the provided bolts, washers, and nuts. Use sealing washers if available. Tighten the fasteners in a crisscross pattern to ensure even pressure, but do not overtighten initially.
4. Installing the Striker/Latch Mechanism
- Align Carefully: With the main lock body in place, close the lid to determine the precise location for the striker pin or latching mechanism on the tool box body. The alignment must be perfect for the lock to engage smoothly.
- Mark and Drill: Mark the mounting holes for the striker, use a center punch, and drill the holes as you did in the previous steps.
- Install and Adjust: Secure the striker, but leave the bolts slightly loose. Test the locking action multiple times. Adjust the striker’s position until the lid closes securely and the lock engages without excessive force. Once satisfied, fully tighten the striker’s mounting bolts.
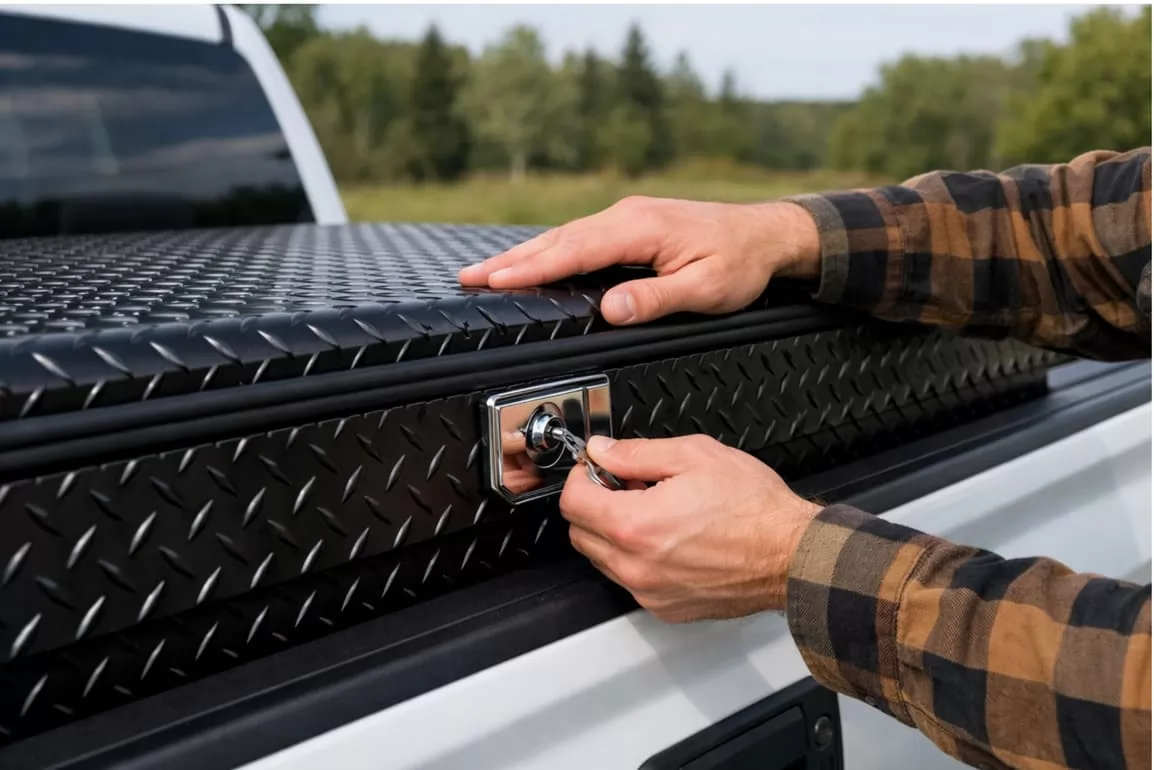
5. Final Adjustments and Testing
- Torque Down Fasteners: Go back and fully tighten all mounting bolts for both the lock body and the striker.
- Test the Seal: Close and lock the lid. Try to slide a piece of paper under the lid seal at various points. If it slides in easily, the seal may not be compressing properly. Adjust the striker position as needed to achieve a firm, weatherproof seal.
- Lubricate: Apply a small amount of graphite or silicone lubricant to the moving parts of the lock mechanism to ensure smooth, long-term operation.
Troubleshooting and Custom Solutions
- Misalignment: If the lock is difficult to operate, the most common cause is misalignment between the latch and the striker. Loosen the striker and make small adjustments until the action is smooth.
- Incompatible Locks: If you find that a standard lock doesn't fit your unique tool box design, custom solutions may be required. For businesses facing such challenges, exploring OEM/ODM services can provide hardware tailored to specific requirements.
- Professional Help: If you encounter significant challenges or are unsure about any step, don't hesitate to seek professional advice. Our expert team is always ready to provide guidance, and you can easily contact us for support.
Conclusion
Properly installing a high-quality lock transforms your truck tool box into a secure vault for your valuable equipment. By following this detailed guide, you can achieve a professional-grade installation that ensures security and durability. Trusting in proven hardware and expertise is the final step to peace of mind.
0
Comments
Leave a Comment
Your email address will not be published. Required fields are marked *
Name can't be empty
Email error!
Message can't be empty
😍
😜
😳
😌
😄
😘
😝
😒
😃
😚
😚
😛
😟
😧
😀
😉
😓
😱
😤
😣
😂
😥
😩
😠
😢
😭
😰
😨
😡
😆
😪
😅
😐
😇
😋
😴
👿
😕
😏
😷
😵
😟
😮
😯
😑
👧
👴
😧
😬
😾
👶
👱
👵
👸
🙀
👺
👦
👩
👨
😽
😿
🙈
💩
💥
💤
😼
😹
🙉
🔥
✨
💦
👎
✌
👆
👈
💪
💹
👍
👊
💴
💶
💷
💸
👉
💵
🙏
🌎
🏧
👏
💳
👇
💑
🙆
🙅
💁
👫
👭
🙎
🙇
👑
👔
Submit Comment
Most Popular
-
 Jul 16, 2025What Are the Different Types of Toolbox Locks?(Comprehensive Guide)
 -
 Sep 18, 2025Top 10 Most Popular Pickup Truck Models in the Americas in 2025
 -
 Sep 11, 2025Top 10 Truck Tool Box Lock Manufacturers in the World
 -
 Sep 30, 2025Top 10 Most Common Special Purpose Vehicles in North America


Laster Blogs


Set A Consultation Today
Name can't be empty
Email error!
Send Your Message
*We respect your confidentiality and all
information are protected.

